After we finished the third cut of our video, we were all pretty much happy with how it looked in terms of the shots we used and the order of everything. The next step was to grade the shots. We did this entirely in Adobe Premiere using the 'ProcAmp' and 'Three-Way Colour Corrector' tools. We could have done this in After Effects and used masks to isolate the background and really bring out the colours but this would have taken much longer and we just didn't have time.
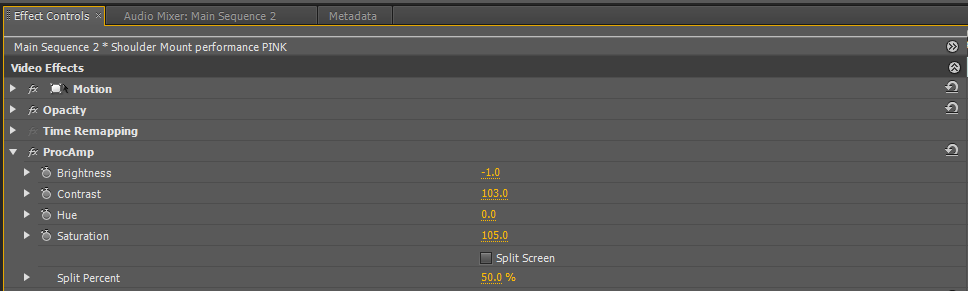 |
| ProcAmp |
ProcAmp allowed us to adjust brightness, contrast and saturation. In general, we tried to increase the saturation as much as possible without making our skin too orange and then adjusted the brightness and contrast depending on the shot. The changes were pretty subtle and we rarely changed anything by more than 5 or 6 values. The split-screen images below show the difference that the ProcAmp tool made to our shots. The left half is with grading and the right is the untouched footage. The colours on the left are more vibrant and the shots are lighter and have more contrast than the images on the right.
This video also shows the difference between our graded and ungraded shots. Again, the right half is not graded and the left half is. The difference is more obvious in the MCUs than in the moving shots but there is still a noticeable change between the two halves for all the shots.
The Three-Way Colour Corrector tool made more subtle changes to the shots. It allowed us to change the shadows, midtones and highlights separately. In general, we added blue to make our skin less orange. There were some shots that required something different but generall we just stuck with making the shots more blue. Again the changes were subtle but the shots did look better with the changes.
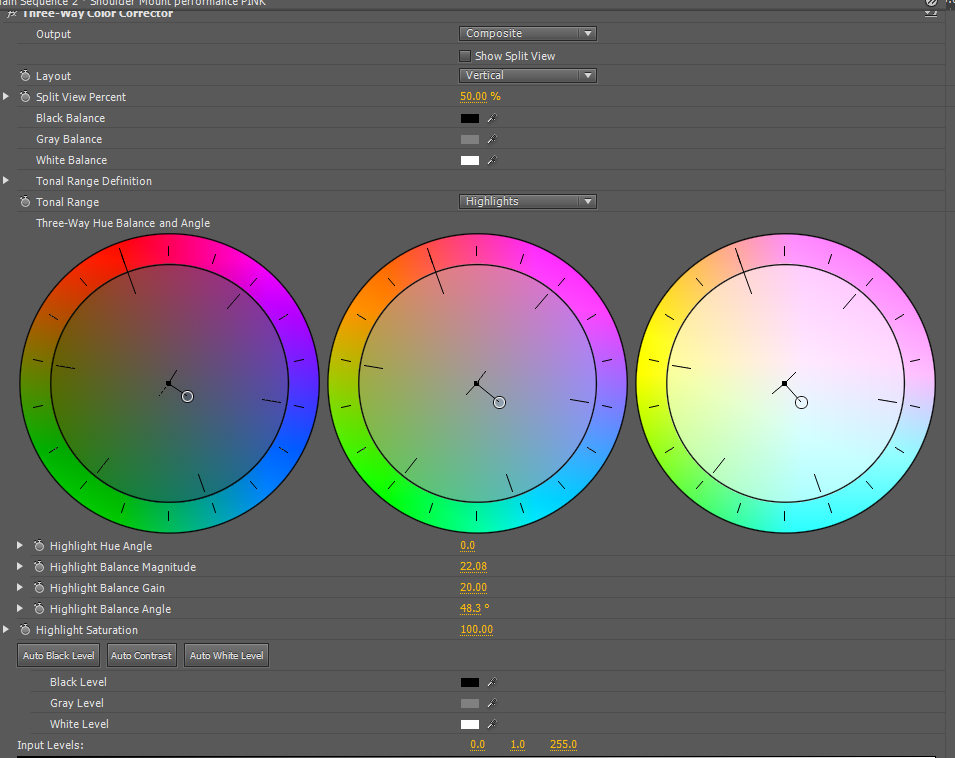 |
| Three-Way Colour Corrector |
We had all used these tools before in our AS project and at other times prior to that so we were all familiar with how to use them. This meant we all took turns grading the shots so the process didn't take too long. We did have to go back and regrade a couple of shots but the changes were only very minor. Overall, I think the grade has really improved our video. The colours were already one of the best features of our video so this process really helped to bring out those colours and improve the video more.
We took a lot of inspiration from the video for George Ezra's 'Budapest' for our grading.
Here are some screenshots from our video for comparison.


No comments:
Post a Comment